Creating Roles
1. To create roles, navigate to the main menu, and under the ‘Administration’ module, click on Roles.

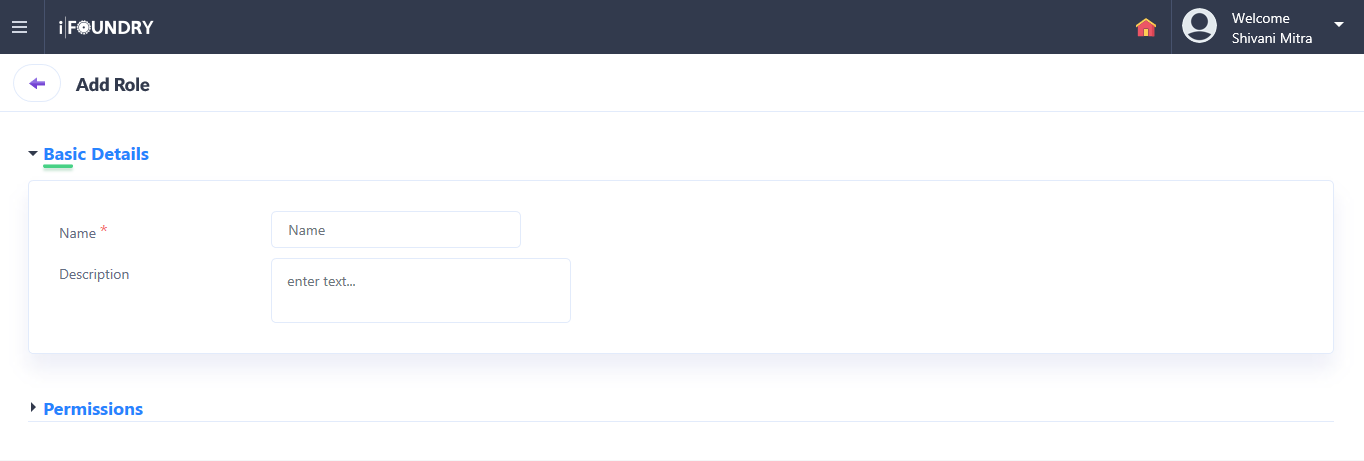
2. In the new window that appears, select the Roles tab, and click on ‘Add New’ to add a new role.
3. Basic details pertaining to the creation of a Role, such as Name and Description will appear, each of which must be input with relevant data.
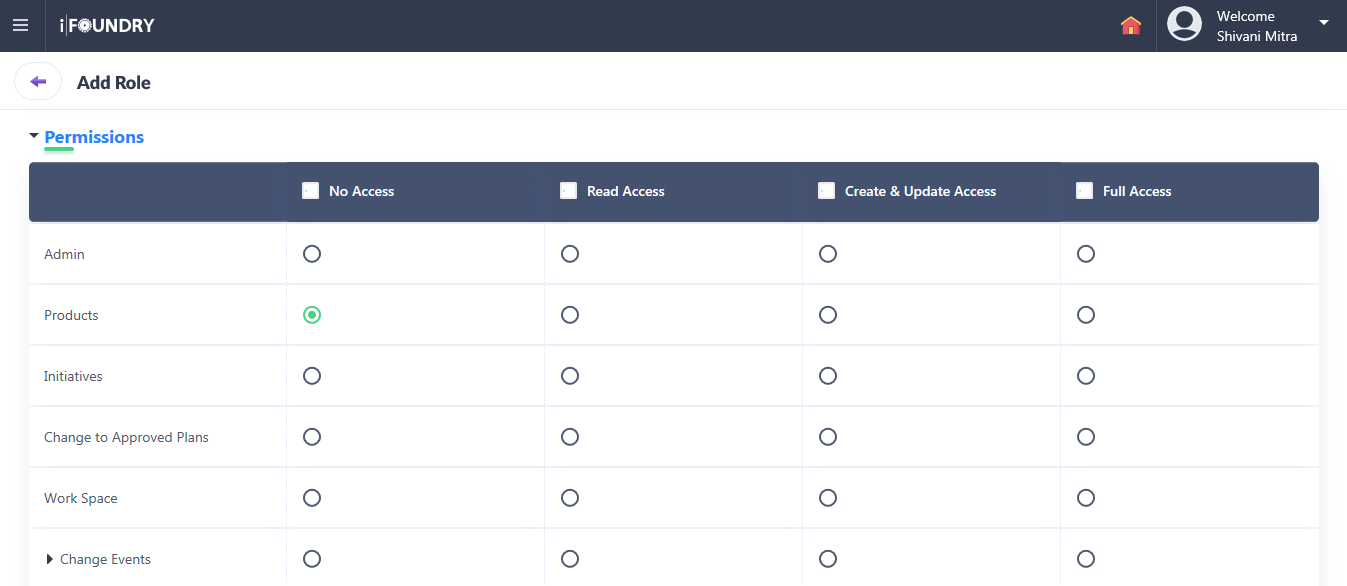
4. Once the basic details have been input, proceed to the Permissions section. For each of the areas within iFoundry, any role being created must be given access. To do so, four levels of access are provided.
-
No Access: Users cannot view the options.
-
Read Only: Users can only view the options, with no authority to make any changes.
-
Create/Update: Users can create or modify the information.
-
Full Access: Users can perform all actions such as view, edit, add, or delete information wherever applicable.
5. When the role and its applicable levels of access have been set, click on Add Role to finish creating a role. In doing so, the role so created along with the permissions assigned will appear in the roles grid.

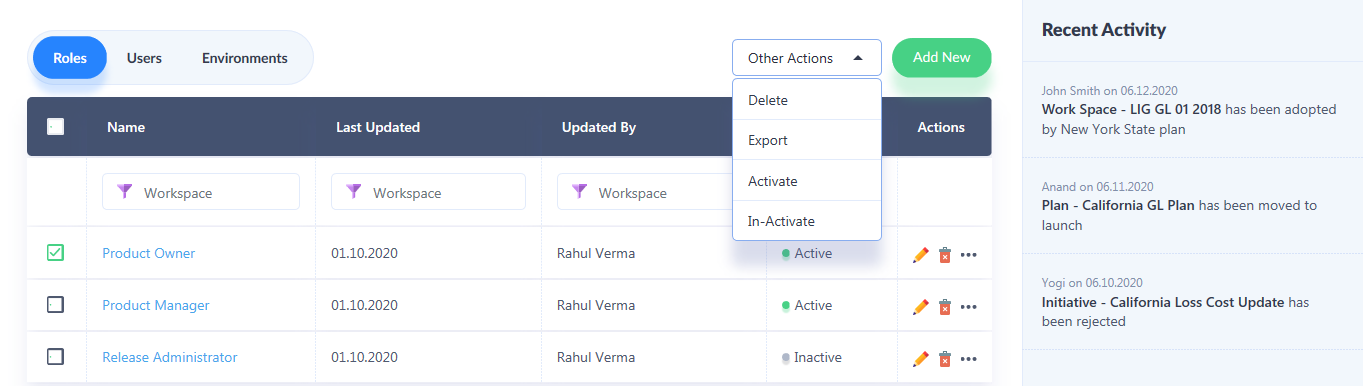
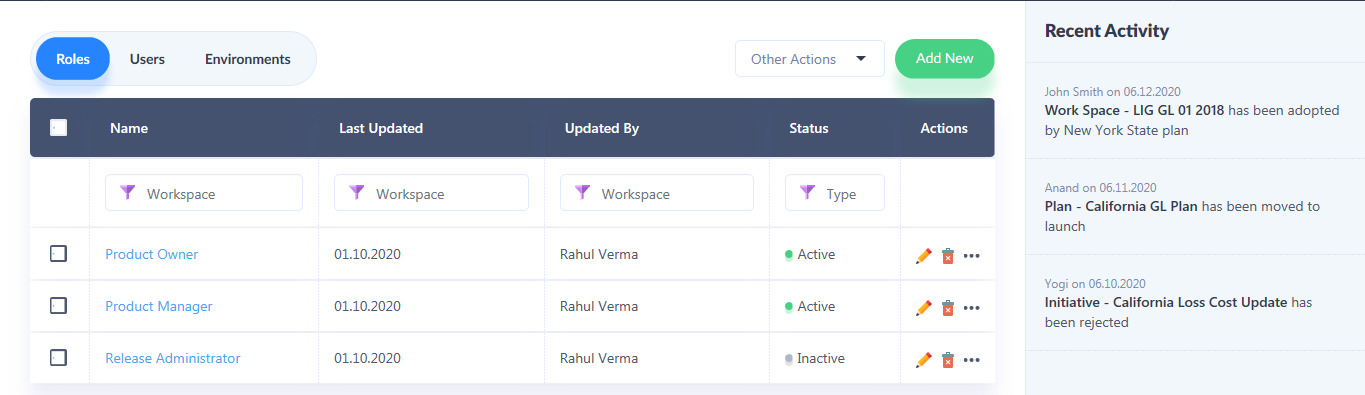
6. As seen in the list, information pertaining to the updates made, along with the status, and specific actions such as edit and delete will appear against each role created.


7. Other actions such as Delete, Export, Activate and In-activate can also be accessed from the drop-down menu above the grid.